How to Make Latte Art Like a Pro: A Step-by-Step Guide

Latte art has become an essential part of the coffee culture, with its mesmerising swirls and patterns transforming a simple cup of coffee into a work of art. Whether you're a professional barista or a coffee lover who enjoys creating beautiful designs at home, learning how to make latte art is a fun and rewarding experience that can elevate your coffee game to the next level.


In this blog, we'll be taking a closer look at the art of coffee making and providing you with some practical tips and tricks to help you create stunning latte art designs at home or at your local cafe. From understanding the importance of milk texture to mastering the techniques of pouring and etching, we'll guide you through the step-by-step process of making latte art like a pro. So, grab your milk jug, and espresso machine, and get ready to unleash your inner artist!

Things You'll Need

Before you start making latte art, it's important to have the right tools and ingredients on hand. Here are the essential items you'll need to create beautiful latte art designs:


Espresso Machine

To make a coffee with latte art, you'll need to start with a shot of espresso as the base So dial in your favourite blend on your home espresso machine. 


Milk Pitcher

A milk pitcher is essential for steaming and frothing milk. Look for a pitcher with a pointed spout, as this will help you to control the flow of milk when pouring and creating designs.


Milk

The quality of milk you use plays a significant role in the taste and texture of your coffee and the look of your latte art Whole milk can be more forgiving when texturing due to the composition of fats and proteins and can create a creamy and rich texture that's perfect for latte art. Ensure to always use fresh cold milk and never restream leftover milk as this will not only affect the flavour but also will make it harder to texture. 


Thermometer

The ideal temperature for steaming milk for latte art is around 60-650C You can use a digital thermometer to test your milk temp at the end of steaming, however placing your hand on the side of the jug to gauge when the jug is too hot to hold, is usually enough to know when to turn off the steam wand and be at the right temperature.


Latte Art Tools

No need to purchase a specific latte art tool for etching, you can use a skewer or the end of a digital thermometer to get the same result. Experiment with different tools to see which ones work best for you.


Espresso Cup

You'll need an espresso cup to pour your shot of espresso into before adding the steamed milk and creating your latte art design. Experiment with different-shaped cups, some people find a wide-mouth cup easier to pour into than a narrow one.


By having these essential items ready, you'll be well on your way to creating stunning latte art designs that are sure to impress.


How to Do Latte Art

How to Make Latte Art

Latte art is the perfect way to add a touch of elegance to your coffee. From the classic heart shape to more intricate designs, latte art can elevate your coffee game and impress your customers or guests. In this guide, we'll take you through the steps to master the art of latte art and create beautiful designs like a pro. Let’s start with the first step:


Phase 1: Pulling Your Espresso

Before you can start creating your latte art, you'll need to pull a shot of espresso as the base for your latte. Here are the basic steps to pulling a perfect shot of espresso:

  1. Grind your coffee beans to a fine consistency. You'll need around 18-21 grams of coffee for a double shot.
  2. Distribute the coffee evenly in the portafilter basket, and tamp it down with even pressure.
  3. Insert the portafilter into the group head of your espresso machine, and start brewing your shot.
  4. The ideal espresso shot should have a rich, caramel-coloured crema on top, and should take around 25-30 seconds to extract.
  5. Experiment with using a double ristretto for the base which is the first 20 seconds of the extraction with the cup placed under both sides of the spout. This style of shot can be easier to pour into for beginners and will give you high contrast for your latte art!

Once you've pulled your espresso shot, you're ready to move on to creating your latte art.


Phase 2: Making the perfect foam

One of the most crucial components of creating latte art is achieving the perfect foam for your milk. Here are the steps to making the perfect foam:

  1. Choose the right milk: Whole milk is the best choice for creating latte art because it produces a rich and creamy texture that's perfect for creating designs.
  2. Start with a clean milk pitcher: Before you start steaming your milk, make sure your pitcher is clean and free from any residue that may affect the taste or texture of your foam.
  3. Fill your jug up to the halfway mark with fresh cold milk. This will leave enough room and give you enough time to create foam with a silky texture.
  4. Purge your steam wand to release any residual water.
  5. Position the steam wand at the 3 o’clock position which will encourage a spinning motion, and turn on the steam wand.
  6. Focus on the height of the milk jug. The steam wand should sit right on the surface of the milk. Listen out for a ‘hissing sound’, which is the air being introduced into the milk to stretch it. You want to do this before the milk jug goes from feeling cold to warm, then there should be no noise. For Latte Art you want a little bit of stretching, but not too much as a dense foam can be challenging for intricate designs.
  7. Once the milk jug feels too hot to hold, turn off the steam, ideally this should be between 60-65oC, as this is when the natural sugars in the milk are most present, also known as the sweet spot. While you are learning, you can use a digital thermometer to test the temperature after steaming. If the temperature is below 60oC, simply add a couple of seconds from when the jug feels too hot to hold, to when you turn off the next jug.
  8. Purge the steam wand and wipe down to remove any milk build up.
  9. After texturing your milk, you will want to use it straight away. Split some of your milk into a smaller milk jug to help with foam ratios and be sure to spin the milk before pouring.

By following these steps, you'll be able to achieve the perfect foam for your latte art, giving you the ideal canvas to create stunning designs.


Phase 3: Pouring the Milk and Espresso Art

Once you have your espresso shot and perfectly steamed milk, it's time to start pouring and creating your latte art design. 

  1. Hold the cup at a slight angle, with the milk jug above. Pierce the crema with a thin stream of milk into the deepest part, like you are diving, and you don’t want to make a splash.
  2. As the cup fills up, you can gently move the jug in a circular motion, drawing over any white that appears.
  3. Once the level of the coffee is 3/4s from the top, you want to stop and drop the jug down low, so the tip of the jug is almost touching the surface of the crema. Tip- tilt the cup to get in nice and close.
  4. Increase the flow of the milk by wiggling the jug from side to side to help create momentum and some ripples to your design.
  5. Finish off by lifting the jug straight up away from the surface of the coffee, and or cut through if your pattern requires this.
  6. To create more intricate designs, use a latte art tool, such as a skewer to add details and outline your design.

By following these steps and practising your pouring technique, you'll be able to create beautiful and intricate latte art designs that are sure to impress your customers or guests.

Common Latte Art Designs

Creating a rosetta pattern

Creating a rosetta pattern is a classic latte art design that's popular among baristas and coffee lovers alike. Here are the steps to creating a beautiful rosetta:

  1.  Hold the cup at a slight angle, with the milk jug above. Pierce the crema with a thin stream of milk into the deepest part, like you are diving, and you don’t want to make a splash.
  2. As the cup fills up, you can gently move the jug in a circular motion, drawing over any white that appears.  Once the level of the coffee is 3/4s from the top, you want to stop and drop the jug down low at the top of the cup, so the tip of the jug is almost touching the surface of the crema. Tip- tilt the cup to get in nice and close. Increase the flow of the milk by wiggling the jug from side to side, to help create momentum, while slowly moving the jug back towards you, to draw some leaves on the surface of the crema.
  3.  Keep wiggling from side to side while moving the jug backwards till you get to the other side of the cup. By this point, the cup should be full and you can finish off by lifting the jug straight up away from the surface of the coffee, and or cut through creating the steam of the rosetta.

Creating a heart pattern

Creating a heart pattern is a classic latte art design that's simple, yet elegant. Here are the steps to creating a beautiful heart pattern:

  1. Hold the cup at a slight angle, with the milk jug above. Pierce the crema with a thin stream of milk into the deepest part, like you are diving, and you don’t want to make a splash.
  2.  As the cup fills up, you can gently move the jug in a circular motion, drawing over any white that appears.

Once the level of the coffee is 3/4s from the top, you want to stop and drop the jug down low, so the tip of the jug is almost touching the surface of the crema. Tip- tilt the cup to get in nice and close. Increase the flow and wiggle the jug from side to side to help create momentum and some texture to your heart5 Finish off by bringing the tip of the jug away from the surface of your coffee and cutting through to create your heart

10 Tips for Pouring Latte Art

How to Make Latte Art

  1. Use a clean and dry pitcher to avoid cross-contamination and to ensure the best texture and flavour.
  2. Use fresh cold milk every time. The colder your milk is, the more time you have to allow the milk to spin creating the microfoam needed for latte art.
  3. Use a split jug to pour off the first half of the milk after steaming. This will allow more room in the pouring jug making it easier to pour latte art.
  4.  Start with a basic design, like a dot, as this is the base for most latte art. Once you have perfected this then lift up the jug and pull through to create a Heart. Stack multiple dots on top of each other and pull through to get a Tulip.
  5. Pay attention to the speed and angle of your pour to create more intricate designs, and ensure the tip of the jug is just above the surface of the milk.
  6. Use a steady hand and avoid shaking or jerking the pitcher, as this can cause the milk to splash and ruin your design.
  7. Be patient and take your time while pouring, as rushing can lead to mistakes and poorly defined designs.
  8. Practice on a regular basis to build muscle memory and to improve your pouring technique. Practice makes perfect.
  9. Use a thermometer to ensure that your milk is steamed to the correct temperature.
  10. Have confidence in your skills and believe in yourself! With practice and determination, you can become a master of latte art.

Master Latte Art by taking Veneziano's coffee courses

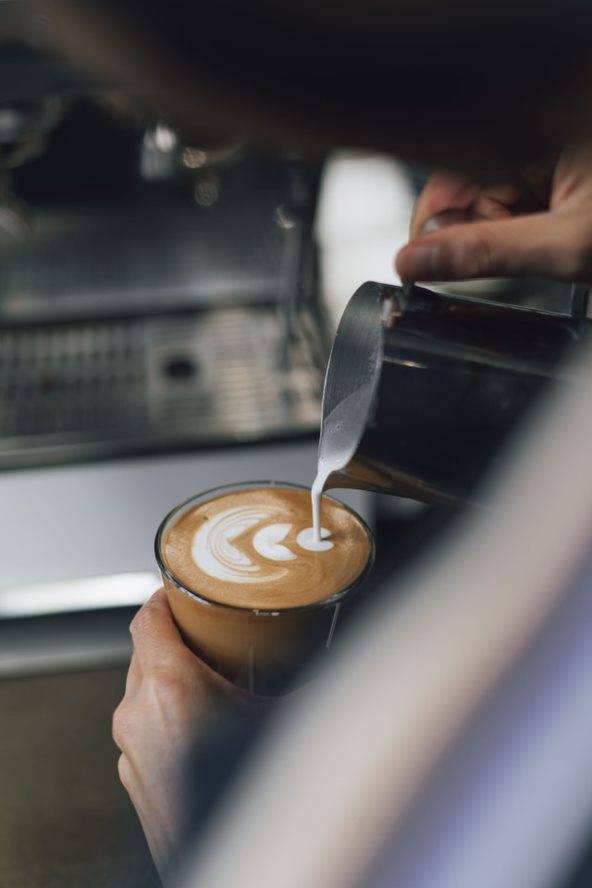
If you want to master latte art, then taking Veneziano Coffee Roasters' coffee courses may be the perfect solution. We have an online coffee course and hands-on coffee training courses designed to provide you with the skills and knowledge needed to create beautiful and intricate latte art designs.


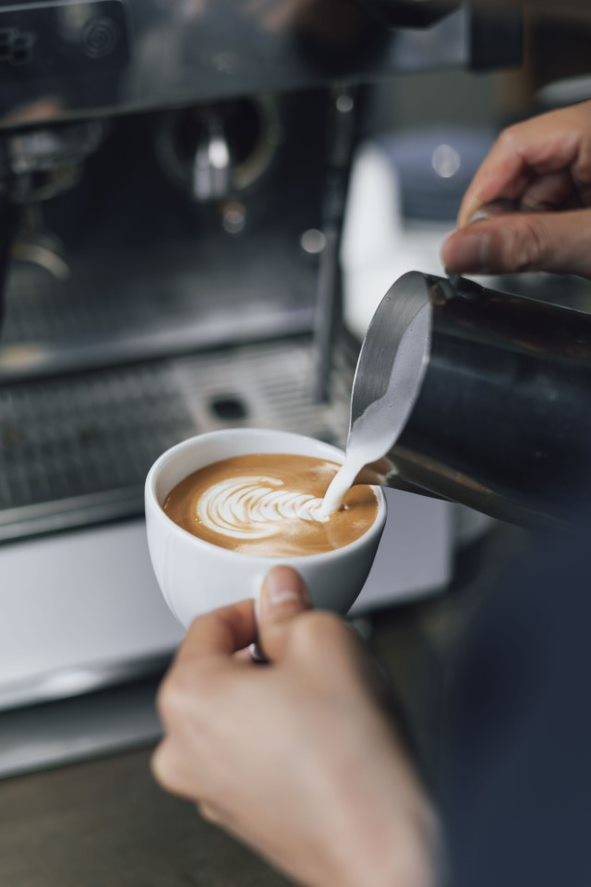
With training studios in Richmond, West End, North Adelaide and Canberra, Veneziano offers several different courses that cater to different skill levels, from beginner to advanced. These courses cover topics such as milk texturing, free pouring techniques, and advanced designs like etching and multiple layers.


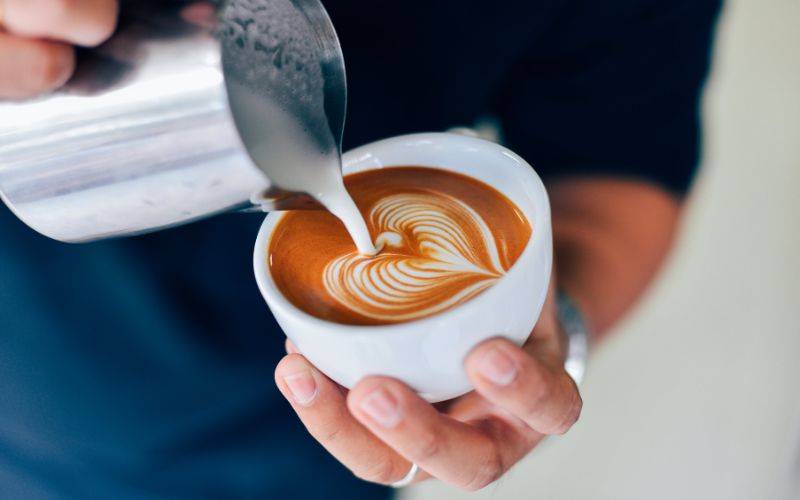
Our courses are led by champion baristas who will guide you through each step of the process, providing you with valuable tips and feedback along the way. In addition to latte art, Veneziano's coffee courses cover a range of other topics related to coffee, including espresso preparation, brewing techniques, and coffee roasting. By taking these courses, you'll gain a deeper understanding of coffee and its various processes, which can help you take your coffee skills to the next level.


Whether you're a coffee enthusiast or a professional barista, Veneziano's coffee courses are a great way to improve your skills and take your latte art to the next level. So why not sign up for one of our courses today and start mastering the art of latte art?

Frequently Asked Questions

Do cup size and shape impact latte art?

Yes, the size and shape of the cup can have an impact on the appearance of latte art. A cup with a wide, flat surface area will allow for more space to create intricate designs, while a taller and narrower cup may limit the amount of space you have to work with. Additionally, the thickness and weight of the cup can also affect your pouring technique, so it's important to experiment with different types of cups to find the one that works best for you.

What type of milk is best for latte art?

Whole milk is generally considered the best type of milk for latte art, as it creates a smooth and creamy texture that is perfect for creating designs. However, many baristas also use alternative milk such as soy, almond, or oat milk, which can produce different textures and flavours. Ultimately, the type of milk you choose will depend on your personal preference and the desired taste and texture of your latte art.

How long does it take to perfect latte art?

The time it takes to perfect latte art varies from person to person and depends on several factors, such as natural skill, prior experience, and the amount of time spent practising. Some baristas may be able to create basic latte art designs after just a few hours of practice, while others may take weeks or even months to perfect their technique.


It's important to remember that latte art is a skill that requires patience, dedication, and a willingness to learn from mistakes. The more time and effort you invest in practising and refining your technique, the more confident and skilled you will become at creating beautiful and intricate designs.

Can you use non-dairy milk for latte art?

Yes, you can definitely use non-dairy milk for latte art. While traditional cow's milk is the most commonly used milk for latte art, non-dairy milk such as soy, almond, oat, or coconut milk can also be used. However, it's important to note that the texture and consistency of non-dairy milk can vary widely, which can affect your ability to create latte art. For example, soy milk tends to have a smoother texture than almond milk, which can make it easier to create latte art. Ultimately, it may take some experimentation to find the best non-dairy milk for your latte art needs.

How do you fix mistakes in latte art?

Fixing mistakes in latte art can be a bit tricky, but here are some tips:

  1. Use a spoon or a latte art pen:If you make a mistake while creating a design, you can use a spoon or a latte art pen to carefully remove the unwanted foam or milk from the surface of the drink. Be sure to work slowly and gently to avoid making the mistake worse.
  2. Start over: If the mistake is too large or you're not happy with the overall design, it's best to start over with a fresh canvas. You can simply pour out the drink and start over with a new shot of espresso and fresh milk.
  3. Get creative: Sometimes, mistakes can lead to creative new designs. If you make a mistake, try incorporating it into the design by using it to create a new shape or pattern. This can add a unique touch to your latte art and show off your creativity.

My latte art is not turning out the way I want it to, what am I doing wrong

There could be several reasons why your latte art isn't turning out the way you want it to. Here are some possible reasons:

  1. Milk temperature: The temperature of your milk is crucial for creating latte art. If the milk is too hot, it will be difficult to create a good texture, and if it's too cold, the foam won't hold its shape. Try to aim for a milk temperature between 60-65°C (140-150°F) for the best results.
  2. Milk texture: Getting the right texture for your milk is also important for creating latte art. Ensure to start with fresh cold milk, and position the steam wand to encourage the milk to spin, creating the microfoam needed for latte art. If your milk is too thin or too thick, it can be difficult to create intricate designs.
  3. Pouring technique: The way you pour your milk into the espresso can also impact the final design. Start off high with a slow stream of milk, then as the cup fills up, drop down low with the tip of the milk jug almost touching the surface of the coffee, and pour fast to allow the milk to pour out on top of your canvas.
  4. Practice: Latte art takes practice and patience. Don't get discouraged if your latte art doesn't turn out perfectly at first. Keep practising, and you'll eventually develop the skills and techniques needed to create beautiful designs.

Search